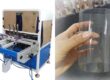

Clear Mailing Tube Machine Mode Installation (16~21 step)
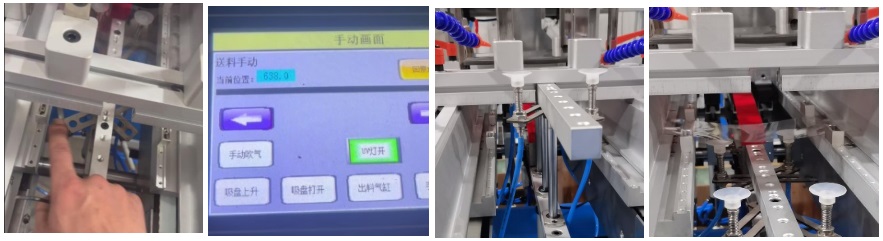
16. Open the suction cups to pick up the material and adjust feeding block
- The function of the material feeding block is to translate the material picked up by the suction cup to the material placing position.
- Loosen the fixing screws of the material feeding block and expand the spacing of the positioning blocks. It is recommended to place it at a slightly wider position below the transverse guide rod.
- Place a sheet of material in the material storage rackof clear mailing tube machine. After adjusting the position of the suction cup, click “Suction Cup Open” and then click “Suction Cup Rise”.
- The suction cup picks up the material and descends. Fine-tune the position of the feeding block so that the front and rear edges of the sheet material are close to the inner side of the feeding block.
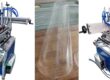
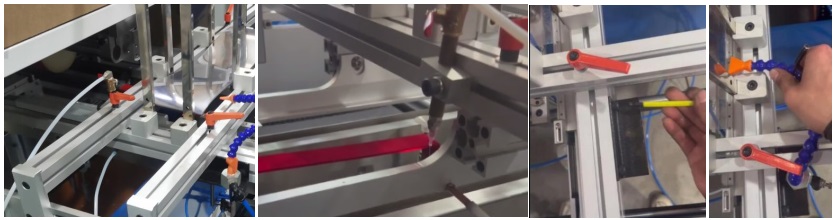
17. Positions of the Glue Gun and the Air Blow Gun

- Adjust the position of the glue gun so that it is as close as possible to the left feeding guide rod. The needle tip should point towards the glue recycling holeof clear mailing tube machine.
- Loosen the corresponding fixing screws of the air gun support plate, and adjust the direction of the air nozzle so that the material separating air nozzle can blow onto the bottom few sheets of materials.
- Redetermine the position of the magnetic suction base plate of the air gun, and lock the fixing screws.
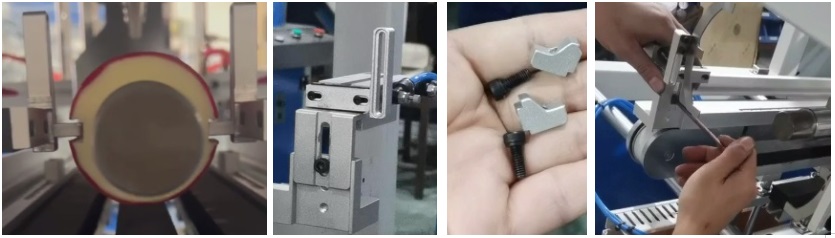
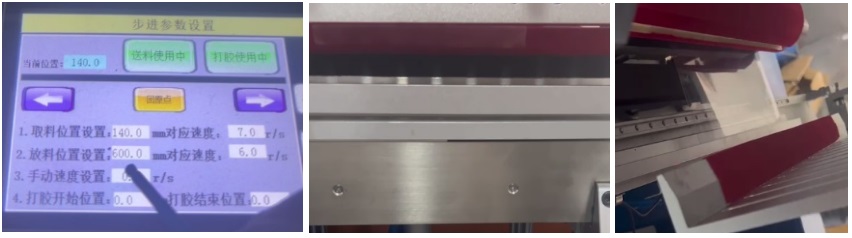
18. Setting of the Feeding Point
- Feeding Point: The value at which the sheet material in the feeding block moves forward along with the main guide rod to the stop position after the suction cup picks up and places the material.
- In step 17, the position of the material taking point has already been set (try to make it fall below the center of the clear mailing tube machine mold).
- In order not to affect the normal pushing out of the formed cylinder by the discharge clamp, the feeding point should be approximately 4 to 8 mm behind the material taking point.
- In the manual mode, return to the origin – pick up the material – move forward, and observe whether the sheet material stops slightly behind the previously marked material taking point.
- For materials with a width of 130, it is feasible to set the feeding point at 700. (It is recommended to round the value.)
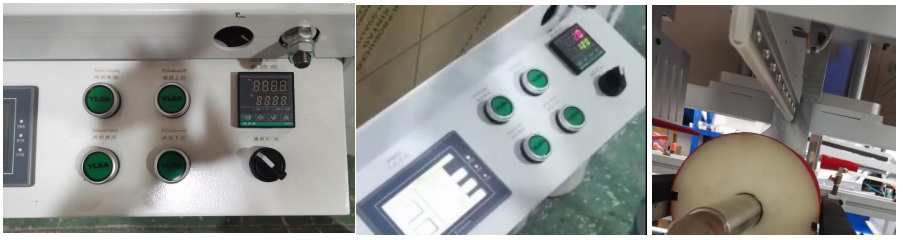
19. Turn on temperature control switch -Preheat the upper pressure plate.
- Turn on the temperature control switch and preheat the lower pressure plate for pre-forming (with heating tubes inside).
- The upper part of the temperature display shows the current temperature, while the lower part shows the target temperature.
- For conventional PVC/PET sheet materials with a thickness of 0.3 – 0.4 mm, the conventional preheating temperature is set at 120 (units should be specified here, such as degrees Celsius, like 120 °C).
- In daily operations, after starting the clear mailing tube machine. preheat for 10 to 15 minutes. Once the temperature reaches the target temperature, Turn on the glue gun and start
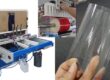
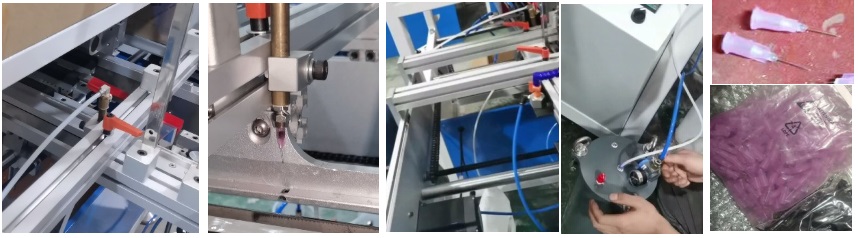
20. Replace the needle tip, check the glue dispensing situation
- Turn off the air pressure switch of the glue air tank and the glue switch, and fine-tune the position of the glue needle so that the glue can be injected into the glue recycling hole.
- The glue recycling hole is connected to a white glue hose. Please insert the hose into the glue recycling bottle for subsequent reuse.
- Turn on the air pressure of the glue air tank and the glue switch, and confirm that the glue can flow out normally like a thin line.
- If no glue is flowing out and the air pressure of the glue air tank is normally around 2 kilograms, it indicates that the needle tip is blocked and the needle tip needs to be replaced.
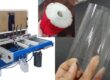
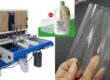
- Take some cotton and knead it into small balls, then put them into the connection position of the needle tip. Loosen the fixing nut of the needle tip, take out the old needle tip, and replace it with a new one.
- The cotton has the function of filtering impurities in the glue, which can prevent the needle tip from being blocked.
- Turn on the switch of the glue air tank and the glue switch, and check again whether the glue flows out smoothly in a straight line. If it is okay, lock the screws.
- Note: When replacing the glue needle tip, the glue air tank and the glue switch must be in the off state.
21. Manual Make Test Sample and Check Whether the Positions
After completing the inspection and installation of the glue needle tip, start to check whether all the previous adjustments are in place. The methods are as follows:
- Place a piece of film directly below the clear mailing tube machine mold, and the left and right edges of the film should be respectively inside the sheet material pushing guide rods.
- Press the buttons of “Molding Positioning”, “Upper Molding Pressure”, “Side Molding Pressure” and “Lower Molding Pressure” in sequence.
- Observe whether the overlapping position is directly below the molding positioning. If so, press the “Start” button to check the glue dispensing effect.
- If the overlapping position of the film is not below the molding positioning plate, adjust the positions of the upper positioning plate, the side molding pressure plate, the side molding pressure plate and the sheet material pushing guide rod according to the offset direction.
- After molding, check the glue dispensing effect of the molded sample. Adjust the pressure of the glue air tank or the feeding speed according to the glue dispensing requirements.
- If you are not satisfied with the effect of the sample, adjust the corresponding positions according to the existing problems until the molding effect is okay.
- Note: Before the formal production, pls check and lock the fixing screws of all components.