
Pvc clear packaging box machine touch screen introduction
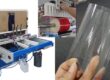
1. Preparation before Use our clear packaging box machine
- After the clear packaging box machine model JC-180S-AG arrives, unpack it and check whether the controller, indicator lights and the surface show any signs of damage, and also check for any looseness.
- Check the control voltage requirement (single-phase alternating current 220V), and ensure that the system is well grounded.
- Connect the machine to the power supply and the air source. Note that the power switch should be turned off first (in the OFF position).
- Connect air pipe to a clean, lubricant-free compressed air source with a maximum pressure of 0.7MPa.
- Adjust lowering speed controller to a lower position, set the pressure regulator to 0.5MPa.
2. Main Control Panel

- Stop – Press the button, and the clear packaging box machine will stop working.
- Start – Press the button, and the equipment will start working normally.
- Power Switch – Rotate it to the right to turn it on, and rotate it to the left to turn it off.
- Emergency Stop Switch – press it when abnormal situation occurs, machine cut off the power supply automatically
- PLC Control Panel – When the power switch is turned on, the screen will start simultaneously.
- Molding Positioning – Press the button&the bottom positioning plate will lift up to press the upper mold.
- Upper Molding Pressure – Press the button, and the upper pressure plate below the mold will lift up.
- Side Molding Pressure – Press the button&the side pressure plates on both sides of the mold will retract.
- Lower Molding Pressure – Press the button& hot pressure plate at the top of the mold will press down.
- Temperature Display – The value on the upper part is the current position of the upper pressure mold, and the lower part shows the preset target temperature.
- Temperature Control Switch – Rotate it to the right to turn it on, and rotate it to the left to turn it off.
3. PLC Control
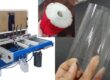
3.1 urn on Interface

- Turn on the power switch, the main screen will display as shown in the figure above.
- By default, the interface is in Chinese. Click “English” to enter the English automatic control interface of machine.

3.2 Automatic interface
- Manual Operation – The equipment is in the manual operation state. It is usually used for testing or when installing and replacing the mold.
- Reset – This function is only effective in the automatic state. After the main guide rod returns to the cursor origin, it will automatically move to the starting position of the feeding clamp.
- Production Quantity Setting – You can set the production target here. When the production quantity reaches the target, the equipment will automatically stop running.
- Current Production Quantity – It is calculated from the time when it was last cleared to zero. It represents the current number of formed cylinders. It is often used for counting in a single order.
- Clear – Clear the value of the “Current Production Quantity” to zero.
- Manual Interface – The setting interface of the equipment in the manual state.
- Parameter Interface – This interface is used to set the operation time of each cylinder of the corresponding component when the clear packaging box machine model JC-180S-AG is running automatically.
- Manufacturer Interface – That is, the main boot-up interface.
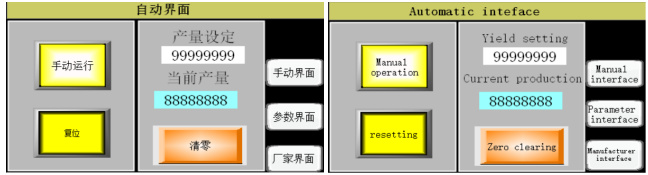
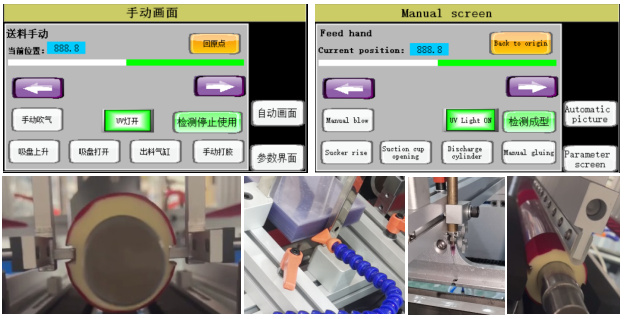
3.3 Manual Screen
- Return to Origin – The main guide rod/cylinder moves to the cursor origin.
- Move Left – When you press this icon, the main guide rod moves to the left. When you release the icon, the main guide rod stops moving.
- Move Right – When you press this icon, the main guide rod moves to the right. When you release the icon, the main guide rod stops moving.
- Manual Air Blowing – When you press this icon, the air gun beside the material storage rack blows air, which is mainly used to separate the sheets.
- Suction Cup Rise – When you press this icon, the vacuum suction cup rises from the bottom.
- Open Suction Cup – When you press this icon, the air holes of the suction cup open.
- Discharge Cylinder – When you press this icon, the discharge cylinder pushes the discharge clamp into the discharge groove of the mold.
- Manual Glue Dispensing – When you press this icon, glue will come out when the air pressure of the glue gun and the glue cartridge is turned on.
- Automatic Screen – pressing this icon, the interface switches to the auto control interface.
- Parameter Interface – After pressing this icon, the interface switches to the parameter control interface of the clear packaging box machine stepping motor.
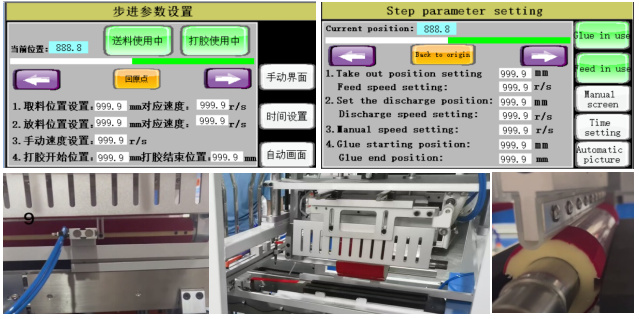
3.4 Step parameter setting
- Current Position – The current position of the material-taking clamp of the material-taking cylinder.
- Material-taking Position Setting – The position where the material-taking cylinder stops and waits for material-taking.
- Corresponding Speed at Material-taking Position – The speed at which the material-taking cylinder ejects the formed cylindrical tube.
- Material-feeding Position Setting – The position of the right edge of the sheet material when the main material-feeding guide rod moves forward.
- Corresponding Speed at Material-feeding Position – The moving speed of the main material-feeding guide rodof clear packaging box machine.
- Manual Speed Setting – In the manual state, the moving speed of the main guide rod when pressforing the “Move Left”/”Move Right” icon.
- Glue Dispensing Start Position – The position where the UV glue turned on (for equipment with the UV glue function).
- Glue Dispensing End Position – The position where the UV glue turned off (for equipment with the UV glue function).
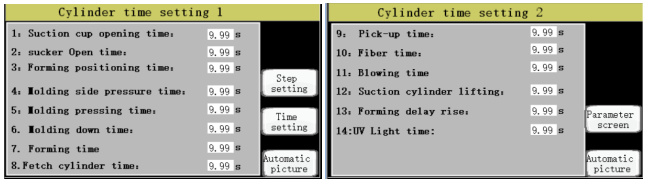
3.5 Cylinder time setting
- Suction Cup Activation Time – Starting from when the suction cup’s lifting mechanism is activated, wait for this set time, then the suction cup will turn on.
- Suction Cup Working Time – Calculated from the moment the suction cup is activated, it represents the duration during which the suction cup operates. After this time, the suction cup will turn off.
- Molding Positioning Time – After the cursor time is completed, wait for this set time, then the upper pressing plate of the molding positioning plate directly below the mold will press the sheet material.
- Molding Side – pressing Time – After the molding upper – pressing time is completed, wait for this set time, then the left and right molding side – pressing plates of the mold will press down on the material.
- Molding Upper – pressing Time – After the molding positioning time is completed, wait for this set time, then the upper molding pressing plate below the mold will press the sheet material.
- Molding Lower – pressing Time – After the molding lower – pressing time (there might be a description error here, it should be after the previous related step is completed), wait for this set time, then the lower molding pressing plate above the mold will press down.
- Molding Time – Time that the lower molding pressing plate stays on the mold after pressing the material.
- Material – taking Cylinder Time – After the molding time is completed, wait for this set time, then the material – taking cylinder will push the formed cylindrical tube out of the clear packaging box machine.
- Material – taking Completion Time – After the discharge clamp pushes the formed material out of the equipment, wait for this set time, then the material – taking cylinder will return to the origin.
- Optical Fiber Time – After the sheet material is sent to the material – feeding position by the main guide rod, wait for the set time, then the upper pressing plate of the molding positioning plate will press down.
- Air – blowing Time – The activation time of material – separating air gun beside the material storage rack.
- Suction Cup Cylinder Lifting Time – The time taken for one cycle of the suction cup to rise from the bottom and then return to the bottom.
- Molding Delayed Lifting – The delay time for the molding positioning plate to lift after the molding time (only for equipment with UV glue function).
- UV Lamp Time – Time during which UV lamp is turned on (only for equipment with the added UV glue function).